Ashtray Quickie
NOTE: This was whipped up really fast just to demonstrate how to make the curved rests for a cigarette ashtray using Sub-Patches. It's pretty basic, but may come in handy. I really should update it to include Bandsaw, but it was really written for a specific person. I'm just adding it as content here :)
(assuming you want 4 holders, which is pretty standard, though you could make it using any number, you just have to do the math for how big of a wedge you need to make...)
1. In Modeler, draw a cross section of the ashtray. Use the Lathe tool to make that a 90 degree wedge. If you want three holders, make a 120 degree wedge. To calculate it for any number of holders, divide 360 degrees by N (number of holders). Simple really :)You should now have a wedge something like the one below (Fig 01)
(you can see in the cross section I created, I use VERY simple geomety, to keep the initial poly count pretty low.)
Fig 01
Now, select four top points, such as in the above diagram, and drag them down so you get a wedge shape in the top, such as Fig 02
Fig 02
At this point, I would also recommend deleting the two cross section polygons that are created when the Lathe is performed. They could cause issues later. They are the highlighted wedges in Fig 02. Once you do so, you should have something like Fig 03.
Fig 03
Now, subdivide your object once. When you do that, you can tweak the shape of the cigarette holders with the added points, to make the curve smoother. It's up to you if you want to triple your polygons at this point. Some would, some won't. I did for this example. When tripled, you avoid the whole non-planar polygon issue. You should have something like Fig 04 at this point.
Fig 04
Now you can use the mirror tool once each on the X and Z axis to make a complete ashtray. Make sure you merge your points or you'll get some weird surfacing at these seams. Voila, an ashtray. I didn't do this step for the sake of this quicky tutorial.You can hit the TAB key to smooth it out, and this will also allow you to adjust the level of detail depending on how close to the camera you want the ashtray to get. Something like Fig 05
Fig 05
Below is a rendered version. This way you avoid the annoyance of >4 sided polys, and weird geometry.
Nothing fancy, just simple methodology.
Well, that about does it. Let me know if you've enjoyed this by dropping me a line at doug@dougplanet.com, (or if you thought it was a waste of bandwidth, but if so, then why did you read the whole thing :)
(assuming you want 4 holders, which is pretty standard, though you could make it using any number, you just have to do the math for how big of a wedge you need to make...)
1. In Modeler, draw a cross section of the ashtray. Use the Lathe tool to make that a 90 degree wedge. If you want three holders, make a 120 degree wedge. To calculate it for any number of holders, divide 360 degrees by N (number of holders). Simple really :)You should now have a wedge something like the one below (Fig 01)
(you can see in the cross section I created, I use VERY simple geomety, to keep the initial poly count pretty low.)
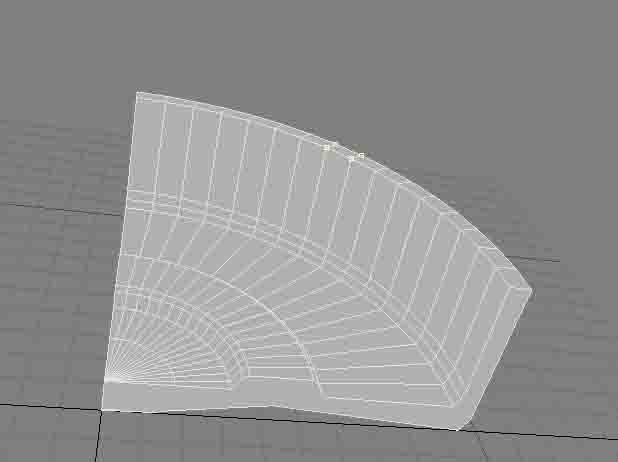
Fig 01
Now, select four top points, such as in the above diagram, and drag them down so you get a wedge shape in the top, such as Fig 02
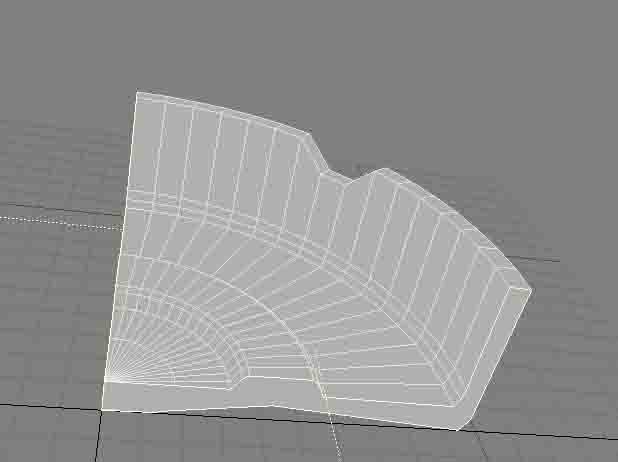
Fig 02
At this point, I would also recommend deleting the two cross section polygons that are created when the Lathe is performed. They could cause issues later. They are the highlighted wedges in Fig 02. Once you do so, you should have something like Fig 03.
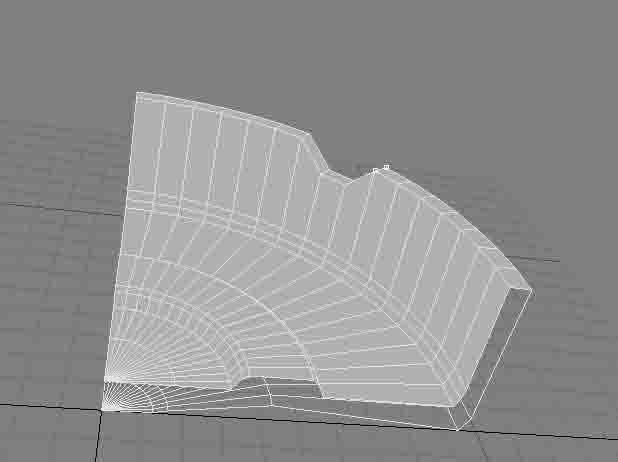
Fig 03
Now, subdivide your object once. When you do that, you can tweak the shape of the cigarette holders with the added points, to make the curve smoother. It's up to you if you want to triple your polygons at this point. Some would, some won't. I did for this example. When tripled, you avoid the whole non-planar polygon issue. You should have something like Fig 04 at this point.
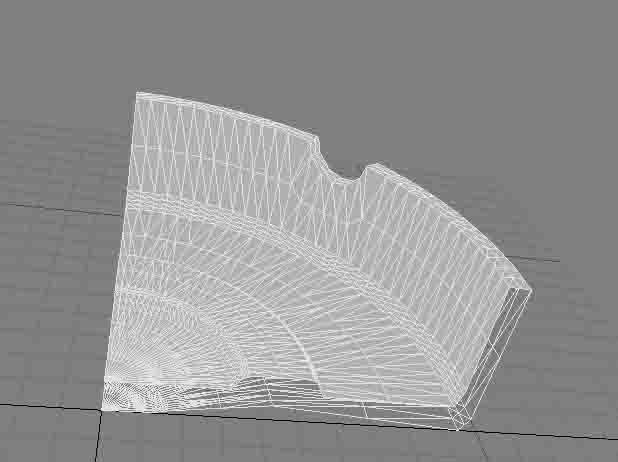
Fig 04
Now you can use the mirror tool once each on the X and Z axis to make a complete ashtray. Make sure you merge your points or you'll get some weird surfacing at these seams. Voila, an ashtray. I didn't do this step for the sake of this quicky tutorial.You can hit the TAB key to smooth it out, and this will also allow you to adjust the level of detail depending on how close to the camera you want the ashtray to get. Something like Fig 05
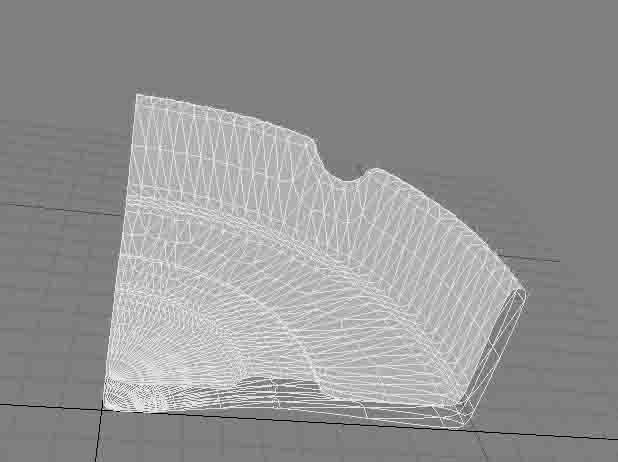
Fig 05
Below is a rendered version. This way you avoid the annoyance of >4 sided polys, and weird geometry.

Nothing fancy, just simple methodology.
Well, that about does it. Let me know if you've enjoyed this by dropping me a line at doug@dougplanet.com, (or if you thought it was a waste of bandwidth, but if so, then why did you read the whole thing :)


0 Comments:
Post a Comment
Links to this post:
Create a Link
<< Home